Star Ceiling Kit vs Panels: Premade Star Ceiling Panels vs a DIY Fiber Optic Kit, Compared Side by Side
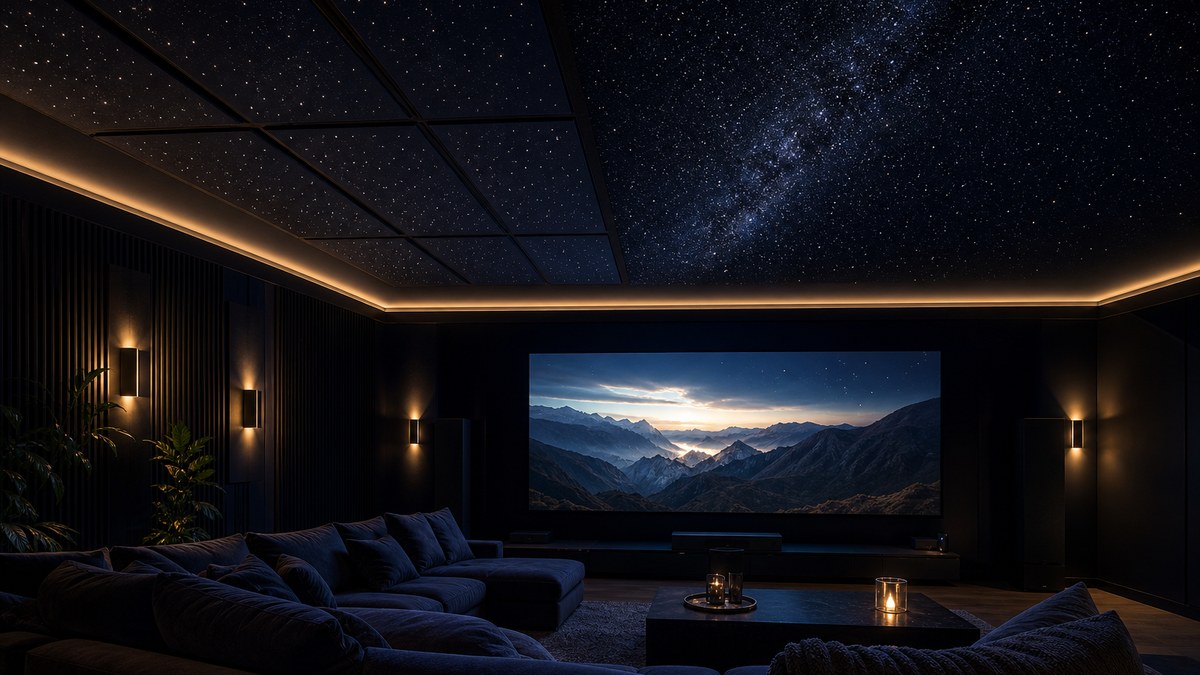
Star ceiling kit vs panels is the first real decision most people face once they have decided they want a night sky overhead. A DIY fiber optic star ceiling kit gives you a light engine and a bundle of loose fibers that you thread through your own ceiling, one hole at a time. Premade star ceiling panels arrive with the fibers already installed, so you mount finished panels instead of building the sky yourself. Both use the same fiber optic technology and both can look superb. They differ in how much work happens on site, what kind of ceiling and access they need, and how much control you have over the final look.
This guide compares a premade star ceiling against a DIY kit side by side: realism, installation, attic access, drywall and drop ceilings, acoustics, effects, room types, timeline, risk and what drives the quote. It is written for homeowners, theater and AV integrators, designers and contractors who want to choose the right system before they order, not after the first hole is drilled.
Choose a DIY fiber optic kit if you have attic or open-joist access above the ceiling and want the most natural, edge-to-edge sky at the lowest material outlay for your time. Choose premade star ceiling panels if you have no access above, want a faster and cleaner install, need acoustic treatment, or are working on a drop ceiling or floating cloud.
- Same core technology: both use an LED light engine feeding fiber optic strands; each fiber tip is a star
- Kit: you drill, thread, glue and trim every fiber; maximum layout freedom; needs access above the ceiling
- Panels: fibers are pre-installed; mount like ceiling or acoustic panels; little or no ceiling demolition
- Realism: a well-built kit reads as one continuous sky; panels can show seams unless finished well
- Best of both: many projects use panels in the field and kit fibers for borders, soffits or odd shapes
- Pricing: project-specific; it depends on area, star density, effects, access and installation scope
What the two options actually are
Before comparing, it helps to be clear about what is in the box. Both options are fiber optic star ceilings. Neither is a projector or a string of LEDs. If you want the background on the technology itself, our explainer on how starlights and fiber optic light engines work covers it in depth.
A DIY fiber optic star ceiling kit
A star ceiling kit is a set of components you assemble into a sky on site. A typical kit includes:
- Light engine (illuminator): the LED source, usually with twinkle, dimming and often color effects, controlled by a remote, app or wall control.
- Fiber optic harness: a bundle of individual fiber strands, often in two or three diameters, gathered into a common end that plugs into the engine.
- Supporting parts: depending on the kit, a drill bit sized to the fibers, adhesive guidance and mounting hardware.
You place the light engine in the attic, a closet or above a drop ceiling, drill a small hole for each star, push each fiber through from above, secure it, and trim it flush below. The ceiling you already have becomes the sky. Our DIY star ceiling installation guide walks through those steps in detail.
Premade star ceiling panels
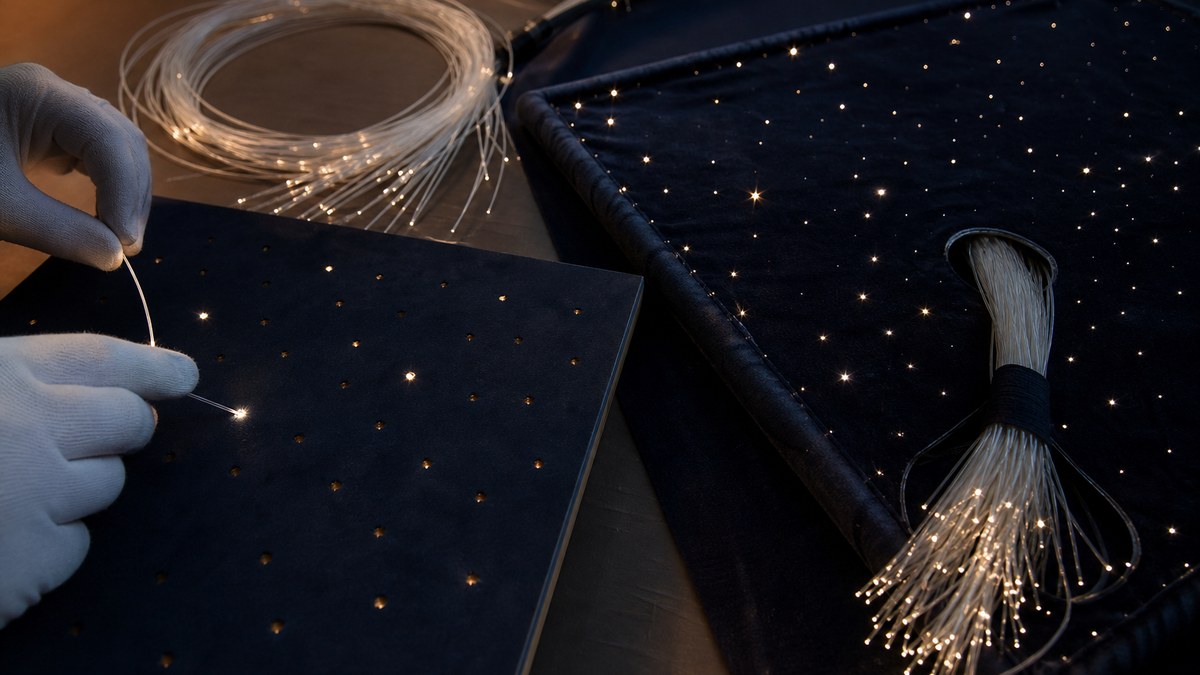
Premade panels move the fiber work from your ceiling to a workshop. The panel substrate (often an acoustic fabric-wrapped panel, a rigid board, or a drop-ceiling tile) arrives with fibers already threaded, trimmed and organized into tails that run to a light engine. On site you:
- Mount the panels to the existing drywall, drop them into a T-bar grid, or hang them as a floating cloud.
- Route the fiber tails from each panel to the light engine location.
- Connect, power up and set the effects.
There is no hole-by-hole threading on site, which is why panels are often described as the easiest way to build a star ceiling. Our star ceiling panels guide covers panel types and mounting methods; this article focuses on the decision between panels and a kit.
Star ceiling kit vs panels: side-by-side comparison
| Factor | DIY fiber optic kit | Premade star ceiling panels |
|---|---|---|
| Realism | Excellent; one continuous sky with no seams, fully random layout | Excellent within each panel; seams and panel edges must be designed in or hidden |
| Layout control | Total; you choose every star, cluster, constellation and Milky Way band on site | Set at the factory; custom layouts possible if specified before production |
| Access needed | Attic, open joists or drop ceiling above the room | Little or none; tails can run in a channel, soffit or above a grid |
| Ceiling demolition | None if there is access above; otherwise drywall work or a build-down | Usually none; panels mount to the finished ceiling |
| On-site labor | High; drilling, threading and trimming every fiber | Lower; mounting panels and routing tails |
| Skill and patience | Moderate to high; attic work, careful drilling, neat fiber management | Moderate; accurate mounting, level layout, clean tail routing |
| Acoustics | None added; ceiling keeps its existing sound behavior | Acoustic panels absorb sound, a real plus in theaters and hard rooms |
| Drop ceilings | Possible, but you are drilling into tiles | Star tiles drop straight into a standard T-bar grid |
| Effects | Twinkle, color and dimming via the engine; shooting stars with extra fiber runs | Same engine-driven effects; shooting star paths can be built into panels |
| Reversibility | Permanent; holes stay in the ceiling | Panels can be removed later with limited patching |
| Best fit | Bedrooms, kids' rooms and theaters with attic or joist access; whole-ceiling skies | Finished basements, condos, rooms without access, theaters needing acoustics, drop ceilings |
Which looks more realistic?
Realism is the question people care about most, and the honest answer is that both can look like a real night sky. What separates a convincing ceiling from an artificial one is design, not the delivery method.
Where a DIY kit has the edge
A kit lets the sky run edge to edge across the entire ceiling with no breaks. You can thin stars out near walls, cluster them into a Milky Way band that crosses the whole room, and place bright "anchor" stars exactly where they look best from the bed or the main seating row. Because every hole is drilled on site, there are no panel joints to manage. In a bedroom where you lie looking straight up, that seamless field is a big part of why a well-made kit ceiling feels like the outdoors.
Where panels have the edge
Panels are built on a bench under good light, which tends to produce very consistent hole spacing, clean fiber terminations and even trimming. The best panel layouts are randomized across panels so the pattern does not repeat. Panels also make it easy to treat the sky as a deliberate design element: a floating cloud with a soft perimeter glow, a framed tray, or a grid of acoustic panels with thin reveals between them. When the seams are part of the design, they stop looking like a compromise.
What actually makes a sky look real
- Multiple fiber diameters: a few bright stars and many faint ones, whichever system you choose.
- Random, uneven spacing: no grids, with areas that are denser and areas that are nearly empty.
- A dark ceiling surface: deep navy or black paint, fabric or panel finish so the stars pop.
- Independent twinkle: fibers from different parts of the harness mixed so neighbors do not pulse together.
- Low room light: other lighting on dimmers so the stars can show.
Our starlight effects guide goes deeper on twinkle, shooting stars, color and Milky Way bands.
Installation compared: what each job really involves
Installing a DIY star ceiling kit
- Plan the sky: mark bright stars, a Milky Way band, any constellation and shooting star paths on a ceiling plan.
- Place the light engine: somewhere dry, ventilated and serviceable, close enough that every fiber reaches the far corners.
- Paint the ceiling dark if you want the stars to stand out, before drilling.
- Drill the holes from below, matching drill size to each fiber diameter.
- Thread fibers from above through each hole, working in sections, and secure them.
- Mix the harness so fibers from different parts of the bundle sit side by side for natural twinkle.
- Trim flush below with a sharp cutter, then power up and set effects.
The time-consuming part is threading. Working in an attic means heat, insulation and awkward reach, and it often takes two people: one below to push a guide through each hole and one above to feed fibers. Patience here is what separates a great DIY ceiling from a frustrating one.
Installing premade star ceiling panels
- Confirm the layout and panel sizes against the actual ceiling dimensions, lights, vents and sprinklers.
- Plan the tail route: where fiber tails from each panel will run to the light engine (above a grid, inside a soffit, through a small chase or along a perimeter cove).
- Mount the panels with the method specified: clips or rails to drywall, drop-in for a T-bar grid, or cables for a floating cloud.
- Route and protect the tails, avoiding tight bends or crushing.
- Connect to the light engine, power up and set effects.
Most of the precision moves to measuring and mounting. Panels must be level and aligned, and tails need a clean path. On a finished ceiling with no attic above, that is usually far easier than opening drywall.
Attic access, drywall and drop ceilings: the deciding factor
For most people the ceiling itself makes the decision. Here is how common ceiling situations line up.
Drywall ceiling with an attic above
This is the classic DIY kit scenario, typical of single-story homes and top-floor bedrooms. Fibers are threaded from the attic, nothing below changes except the stars, and the engine can live in the attic or an adjacent closet. Panels also work here, but a kit makes the most of the access you already have.
Drywall ceiling with a finished floor above
Ground-floor rooms in two-story homes, finished basements and most condos have no way to reach above the ceiling without opening drywall. Searches like "star ceiling without drywall removal" and "star ceiling without drilling holes" usually come from exactly this situation. Surface-mounted premade panels are the cleanest answer; a thin build-down layer with a kit threaded into it is the other.
Drop ceiling (T-bar grid)
Star ceiling tiles that drop into a standard grid are the simplest install of all: lift out a plain tile, set a star tile in, route its tails above the grid. You can also drill your own tiles with a kit, but factory star tiles give cleaner results and keep the original tiles intact. See our basement ceiling star lights guide for drop-ceiling planning.
Open joists (new construction or unfinished basement)
If the ceiling is not finished yet, a kit is very attractive: thread fibers into the new drywall or into a ceiling panel before it goes up, with full access from above. Plan with your drywall and paint trades so fibers are protected during finishing and trimmed afterward.
Vaulted, curved or coffered ceilings
Kits adapt to any shape because every hole is drilled in place. Panels work best on flat planes; on curves, they are usually used on flat sections with kit fibers filling the transitions.
Acoustics, theaters and media rooms
In a home theater or media room, sound often decides the question. Hard drywall ceilings reflect sound; acoustic star panels absorb part of it, which can help dialogue clarity and reduce harsh reflections, while giving you the sky in the same layer. A kit adds no acoustic benefit on its own, although it can be threaded into separate acoustic panels or a stretched-fabric ceiling during construction.
Theaters also benefit from thinking about where effects go. Keep shooting stars out of the screen sightline, use a denser star field and a Milky Way band over the seating, and integrate the light engine with your theater control system so stars dim when the film starts. Our home theater star ceiling design guide and basement home theater star ceiling guide go further on layouts and controls.
Not sure whether a kit or panels fit your ceiling?
Send us the room size, a photo of the ceiling and whether you can reach the space above it. Wiedamark LED will recommend a kit, panels or a combination and follow up with a project-specific quote.
Effects and controls: is there a difference?
Effects come from the light engine, not from whether fibers arrived loose or pre-installed. That means a kit and a panel system using comparable engines can offer the same core features:
- Twinkle: a mechanical twinkle wheel or electronic twinkle that varies brightness across the fibers.
- Dimming: essential in bedrooms and theaters.
- Color: warm white, cool white or RGB/RGBW engines for color scenes.
- Shooting stars: a separate set of fibers in a line, driven in sequence; with a kit you place the path on site, with panels it is built into the panel.
- Control: remote, app, wall control or integration with smart-home and theater systems, depending on the engine.
The practical difference is flexibility. With a kit you can decide on site to add a constellation or move a shooting star path. With panels, those choices need to be made before the panels are built. Our fiber optic star ceiling kit and panel buyer's guide covers light engines, fiber counts, low voltage and color options in more detail.
Kit vs panels by room
Bedrooms and master suites
If there is attic access, a kit usually wins: a seamless sky directly over the bed, with a natural density and a slow twinkle. Without access, a single large panel or a floating cloud above the bed is a clean alternative. Ideas for layouts are in our star light bedroom ceiling guide.
Kids' rooms and nurseries
Small rooms suit a modest kit, and a few panels over the bed work well where access is missing. Either way, keep brightness low enough to work as a nightlight and keep the engine and wiring out of reach.
Home theaters and media rooms
Acoustic star panels are a strong default because they combine the sky with sound treatment. A kit is excellent in a theater being built from scratch, especially with a stretched-fabric or acoustic ceiling planned from the start.
Finished basements
Drop ceilings point to star tiles; finished drywall with a floor above points to surface panels; open joists in a basement still under construction point to a kit. Many basements mix approaches, with panels over the main seating area and kit fibers in a soffit.
Home gyms, spas and recovery rooms
Fiber stars carry no electricity or heat at the ceiling, which helps in humid spaces when the engine sits in a dry, ventilated spot. Panels suit garage and basement gyms with finished ceilings; kits suit rooms with attic access. See our home gym star ceiling guide.
Restaurants, bars, lounges and hotels
Commercial projects usually favor panels or tiles: predictable install time, less disruption, finishes that can meet the project's material requirements, and easy access to the engines for maintenance. Large commercial skies are often designed as zones, each with its own engine and scenes. For whole-building lighting, our sister company WDM Lighting handles large projects, and our commercial lighting services page covers architectural and commercial LED.
The hybrid approach: panels plus kit fibers
Kit vs panels is not always either/or. Some of the best-looking ceilings combine both:
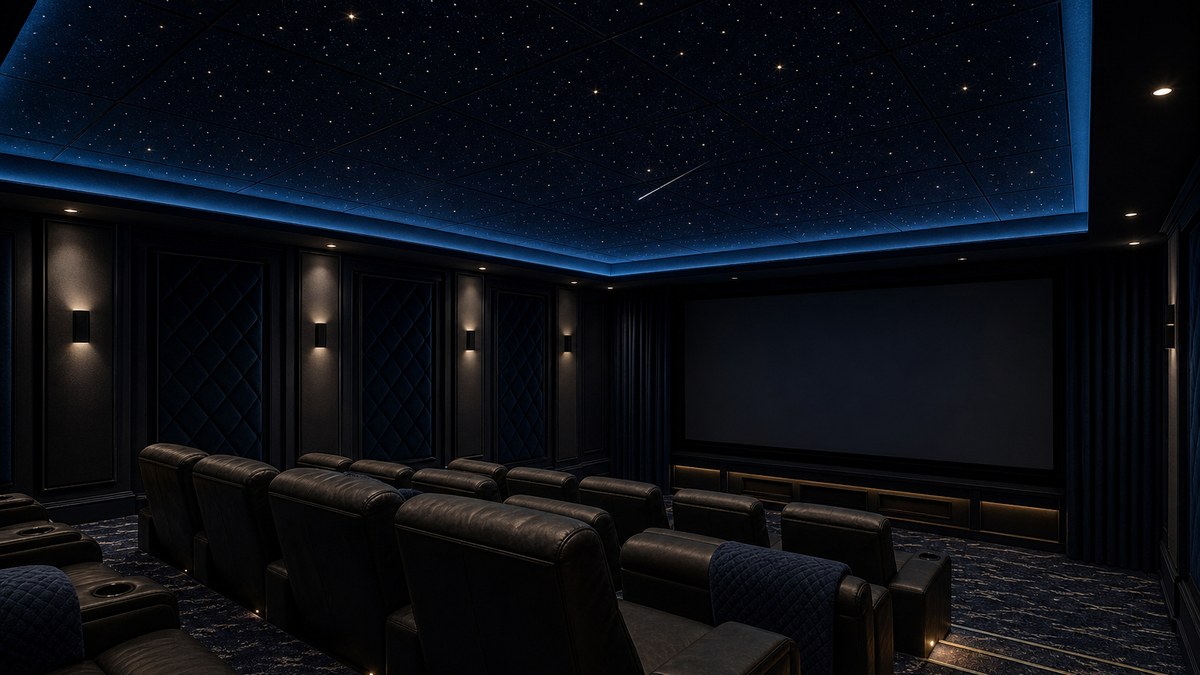
- Panels in the field, kit at the edges: panels cover the main flat area quickly, and loose fibers fill soffits, coves, beams or odd-shaped borders so the sky reaches the walls.
- Panels over seating, kit elsewhere: acoustic panels where sound matters most, kit stars across the rest of the ceiling for a continuous look.
- Feature constellation: a kit-threaded constellation or Milky Way band in a tray, with plain dark panels around it.
Hybrid layouts work best when the light engines, fiber lengths and effects are planned together so twinkle and color match across the whole ceiling.
Common mistakes with each option
DIY kit mistakes
- Fibers too short: measuring the room instead of the actual route through the attic, around joists and down to the far corners.
- Grid-like layouts: evenly spaced holes that read as a pattern instead of a sky.
- One diameter only: every star the same brightness, which looks flat.
- Unmixed harness: neighboring stars twinkling together in clumps.
- Engine in a bad spot: hot, sealed, damp or impossible to reach for service.
- Underestimating the threading: rushing the attic work, which shows below as uneven or recessed fiber tips.
Premade panel mistakes
- Ordering before measuring: panels that collide with lights, vents, sprinkler heads or beams.
- No plan for the tails: panels mounted with nowhere clean to route fibers to the engine.
- Visible repetition: identical panel layouts side by side that make the pattern obvious.
- Seams left unresolved: joints that look accidental instead of designed as reveals or frames.
- Too many engines, mismatched: different twinkle or color tone between zones.
What drives the quote for each option
Wiedamark LED quotes star ceiling projects individually because the right answer depends on the room. The main factors are the same for kits and panels, with a few differences:
| Quote factor | DIY kit | Premade panels |
|---|---|---|
| Ceiling area | Drives fiber count and harness size | Drives the number and size of panels |
| Star density and diameters | More fibers and mixed diameters add to the harness | Set at production; denser layouts mean more fiber per panel |
| Effects | Engine type (twinkle, color, dimming), shooting star runs | Same engine choices, plus built-in shooting star or Milky Way panels |
| Fiber length | Longer runs from engine to far corners | Tail length from each panel to the engine |
| Finish | Ceiling paint and preparation | Panel fabric or finish, acoustic core, framing |
| Installation scope | Your own labor or an installer's time in the attic | Mounting, tail routing and any grid or cloud hardware |
| Controls | Remote, app or integration | Remote, app or integration |
The fastest way to an accurate quote is to send the room dimensions, ceiling type, whether you can reach above it, the effects you want, and a photo. For background on what moves the number, see what drives star ceiling cost and our guide to custom and luxury star ceiling cost factors.
A simple decision checklist
- Can you reach the space above the ceiling? Yes leans kit; no leans panels.
- Is the ceiling a T-bar grid? Star tiles are the simplest path.
- Does the room need sound absorption? Acoustic panels do double duty.
- Do you want an edge-to-edge sky with no seams? A kit, or panels designed with deliberate reveals.
- How much on-site time and patience do you have? Kits trade labor for flexibility; panels trade upfront planning for a faster install.
- Is the ceiling vaulted or curved? A kit, or panels on flat sections with kit fibers in between.
- Might you remove it later? Panels are easier to take down.
- Is it a commercial space? Panels or tiles, planned in zones with serviceable engines.
DIY or professional install?
Both options can be installed by a capable DIYer in a small room, and both benefit from a professional in larger or more complex spaces. Kits reward patience in the attic; panels reward accurate measuring and mounting. Professional installation makes sense for theaters, large rooms, vaulted ceilings, hybrid layouts, hard-wired connections and any commercial project. Our star ceiling installation guide explains how a professional install runs and how to choose an installer. For custom installations, Wiedamark LED works with American Starlight Ceilings. Our licensed installation partner has completed over 200 major sports and commercial projects across the US and Canada — NFL, NBA, NHL, MLS, NCAA and NASCAR.
Why plan your star ceiling with Wiedamark LED
Wiedamark LED supplies fiber optic starlight ceiling components and kits, fiber optic lighting and commercial and architectural LED, with trade pricing for contractors, designers and integrators. Our team brings 15+ years as an authorized architectural lighting dealer and project coordinator. We help you choose between a kit, panels or a hybrid, size light engines and fiber lengths, and plan effects before anything is ordered. Start with our complete starlight ceiling guide, compare fiber optic stars, LED panels and projectors, or see why fiber beats a projector in our fiber optic star ceiling vs LED projector comparison. More guides are on the Wiedamark LED blog.
Frequently Asked Questions
Is a star ceiling kit or premade panels better?
Do premade star ceiling panels look as real as a DIY kit?
Can I install star ceiling panels without attic access?
Do I need to drill holes for star ceiling panels?
How hard is a DIY fiber optic star ceiling kit to install?
Can star ceiling panels go in a drop ceiling?
Are acoustic star panels worth it in a home theater?
Can I combine star ceiling panels and a fiber optic kit?
Which is easier to remove later, a kit or panels?
How much does a star ceiling kit or panel system cost?
Kit, panels or both: let's plan your sky
Tell us the room size, the ceiling type, whether you can reach above it and the effects you want. We will recommend the right system and follow up with a quote.
Related
Our lighting network: starlight ceiling installation, 360° fiber optic lighting, premium pool lighting, WDM Lighting large projects, Dallas commercial LED lighting, Texas LED lighting, Plano LED lighting, LED signage, modular building solutions and Dallas modular structures.