Star Ceiling Without Attic Access: 6 Ways to Add Fiber Optic Stars to a Finished Ceiling, No Drywall Removal
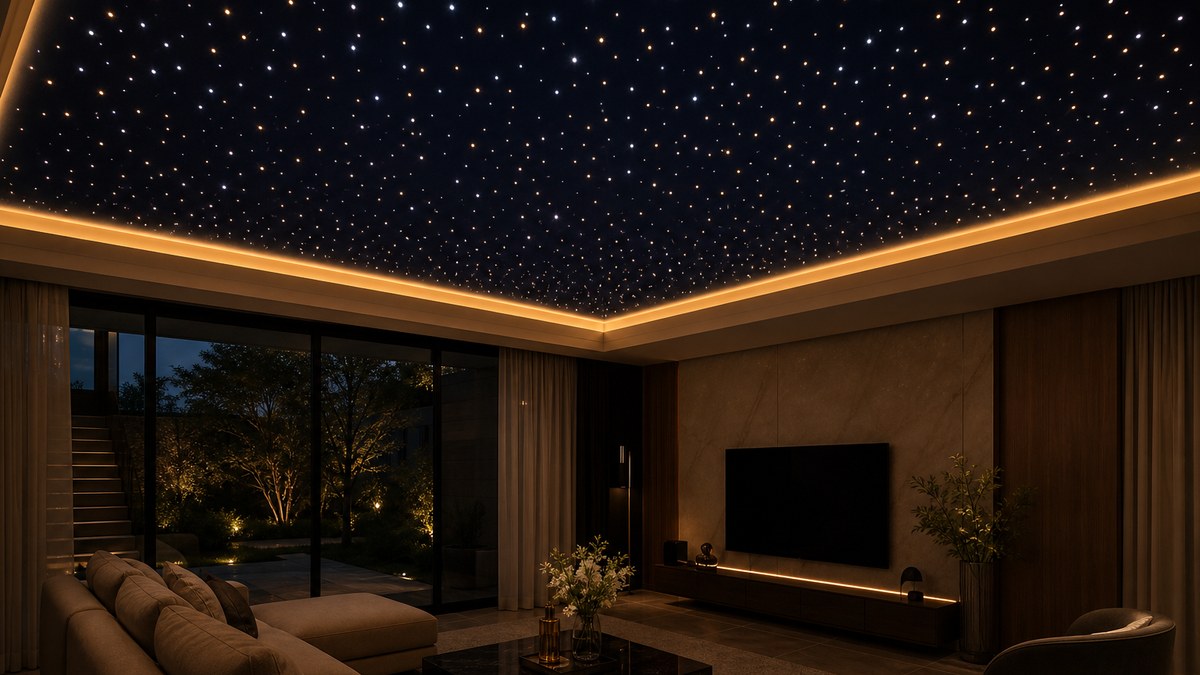
Want a star ceiling without attic access? You are not alone. Most fiber optic star ceiling instructions assume you can climb into an attic, push fibers down through the drywall and hang the light engine on a rafter. But a large share of the rooms people want under a night sky have no attic above them at all: first-floor bedrooms under a second story, basements, condos and apartments, finished bonus rooms, theaters built inside existing homes and most commercial spaces.
The good news is that a missing attic does not rule out a real fiber optic star ceiling. It changes how the system is built. Instead of working from above, you work from below: the stars go into a new surface that is added under the existing ceiling, into panels that mount to it, or into fabric stretched across it. This guide walks through the six practical methods, how to hide the light engine when there is no attic, which approach is easiest for a DIYer, what changes for drywall, drop ceilings and concrete, and how to choose. It is written for homeowners, designers, AV integrators and contractors planning a starlight ceiling in a finished room.
You can install a fiber optic star ceiling without attic access by building the stars into a new layer below the existing ceiling rather than drilling up into it. The light engine moves to a closet, soffit, cabinet or adjacent room.
- Easiest: surface-mount, plug-and-play star panels or a floating star "cloud" that screws to the existing ceiling
- Most seamless: a shallow build-down (furring strips plus a thin new ceiling) with fibers routed in the cavity
- Drop ceilings: swap standard tiles for fiber optic star tiles; the grid is your access
- Tray, cove or soffit: build a perimeter soffit that hides the engine and fiber runs
- Stretch fabric: fibers terminate in a tensioned fabric ceiling on a perimeter track
- Fish from one access point: on some joist layouts, fibers can be pulled through joist bays from a single opening
- No drywall removal needed for any of the first five methods; pricing is project-specific, so request a quote
Why most star ceiling guides assume an attic
A fiber optic star ceiling has three parts: a light engine (an LED illuminator that creates the light and the twinkle or color effects), a harness of fiber optic strands that carries light, and the ceiling surface where each fiber tip becomes a star. If you want the details, our guide to how starlights and fiber optic light engines work covers each part.
In a classic install, an attic makes all three easy. The engine sits on a platform in the attic, the fibers are fed down through small holes in the drywall, and the installer only goes back into the room to trim the fibers flush. That is why the step-by-step in our DIY star ceiling kit installation guide starts with attic access.
Without an attic, three problems show up:
- No place for the light engine. It needs to be accessible for service, dry and ventilated, and within reach of the fiber bundle.
- No way to feed fibers from above. The space over the drywall is a closed joist bay, a floor structure or a concrete slab.
- No easy way to hold fibers in place. Fibers are normally glued or held from the back side of the ceiling, which you cannot reach.
Every method below solves those three problems in a different way. The right one depends on your ceiling height, the look you want, the room type and how much construction you are willing to do.
6 ways to build a star ceiling without attic access
1. Surface-mount, plug-and-play star panels
This is the most common answer to "how do I add a star ceiling to a finished room?" The fibers are installed in rigid panels before they arrive, and the panels mount directly to the existing ceiling with a mounting system or a low-profile frame. The fiber bundles from each panel are gathered and routed to the light engine, usually along the edge of the panel field and then down a wall chase, soffit or corner trim.
- Pros: no drywall removal, no fiber threading on site, fastest install, easy to remove later; acoustic versions also absorb sound.
- Cons: panels add a little depth to the ceiling, and you will see panel seams or a framed field unless the design hides them.
- Best for: home theaters, media rooms, bedrooms under a second floor, basements and rentals or condos where you cannot open the ceiling.
We compare panel types, sizes and mounting options in detail in our star ceiling panels guide, including how pre-made panels stack up against a DIY kit.
2. A floating star "cloud"
A cloud is a framed section of star panels that hangs a short distance below the existing ceiling, with open space around its edges. That gap is useful: it hides the fiber bundles, gives you room to run them to a wall, and lets you add an LED strip on top of the frame for a soft halo. Clouds work especially well over a bed, a seating area, a theater's main viewing zone or a restaurant booth section, and they avoid having to cover the whole ceiling.
- Pros: dramatic, architectural look; only part of the ceiling is covered; the perimeter glow frames the sky.
- Cons: needs enough ceiling height; the frame must be anchored securely into joists or the structure.
3. A shallow build-down (furring strips and a new ceiling layer)
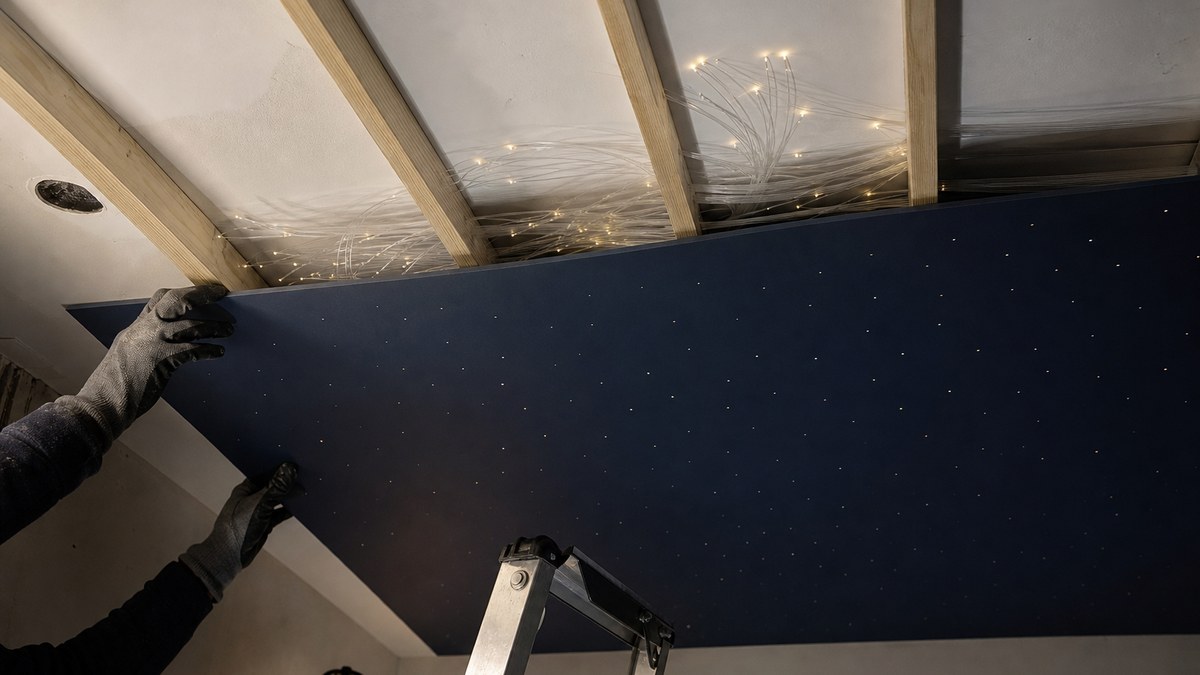
If you want a seamless star ceiling that looks like plain painted drywall with stars in it, the build-down is the method professionals use most. Furring strips or light-gauge framing are fastened to the existing ceiling, creating a shallow cavity. Fibers are laid in that cavity and routed to one edge of the room. A new, thin ceiling surface (often thin drywall, MDF, plywood or a composite panel, depending on the design and local code) is then attached to the furring, and the fibers are pushed through pre-drilled holes and trimmed flush.
Because the new layer can be pre-drilled on the floor before it goes up, much of the fiddly work happens at a comfortable working height instead of overhead. Some installers attach fibers to the back of the new boards before lifting them, then connect the bundle once the boards are in place.
- Pros: most seamless finish, no panel seams, works on almost any flat ceiling, the existing drywall stays in place.
- Cons: the most construction of the six methods; lowers the ceiling slightly; requires finishing (taping, mudding or painting) of the new layer; should be checked against local building and fire codes.
- Best for: master bedrooms, theaters and living rooms where the ceiling is a design focal point.
4. Tray ceiling, cove or perimeter soffit
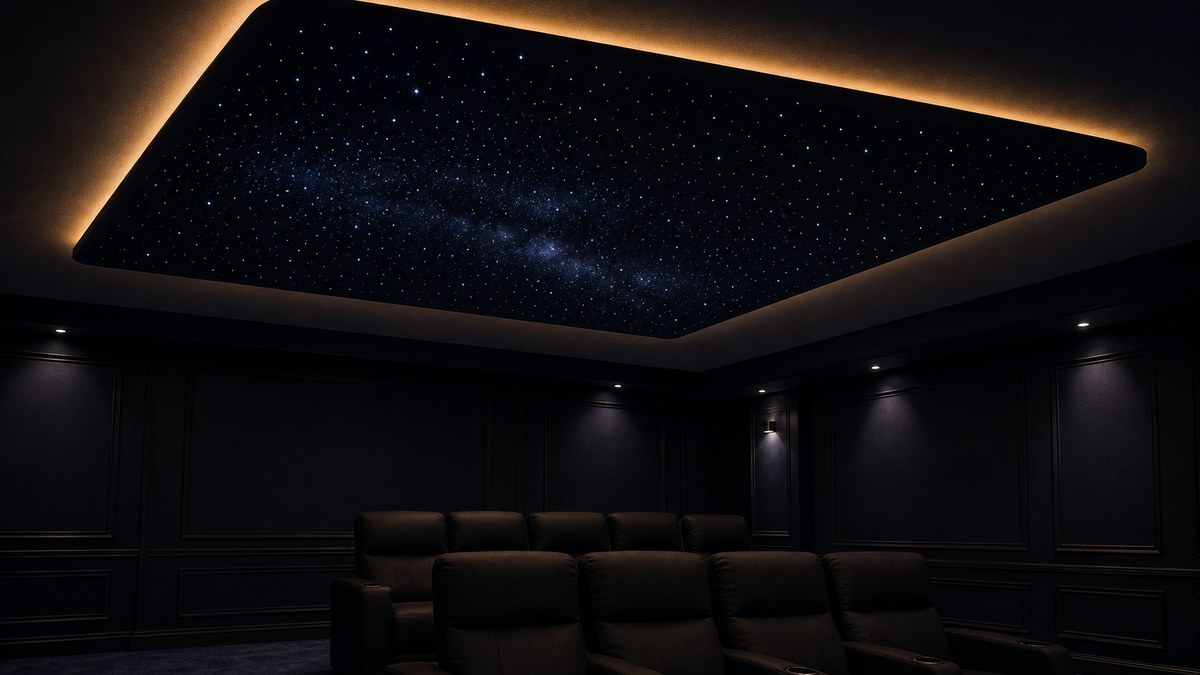
A tray or soffit build turns the "where does the light engine go?" problem into a design feature. A boxed soffit is built around the perimeter of the room (or along one wall), and the center field becomes the star ceiling, either a build-down layer or panels. The soffit hides the light engine, the fiber bundles and the power, and it can carry an LED cove light that washes the star field with a soft horizon glow.
- Pros: solves the engine and wiring location neatly; looks intentional and high-end; cove lighting doubles as ambient room light.
- Cons: needs ceiling height; the engine inside the soffit needs a service hatch and ventilation.
- Best for: theaters, master suites, lounges, spas and restaurants.
Our home theater star ceiling design guide shows how soffits, acoustic panels and horizon lighting work together in a dedicated theater.
5. Stretch fabric star ceiling
Stretch ceilings use a fabric or membrane tensioned across a perimeter track, creating a new, perfectly flat surface below the existing ceiling. For a star ceiling, the fibers are installed behind the fabric and their tips pass through it, with the bundles running in the gap between fabric and old ceiling. Some designers also use dark acoustic fabric over a panel system for a similar look.
- Pros: hides cracks or textured ceilings; very flat and clean; no drywall work; acoustic fabric options.
- Cons: a specialist installation; fabric and fire ratings need to suit the space; harder as a DIY job.
- Best for: commercial lounges, hotels, spas and high-end residential projects.
6. Fishing fibers from a single access point
In some rooms, you can create a small access opening (for example from a closet ceiling, an adjacent unfinished space, a soffit or a removable recessed-light hole) and pull fibers through the joist bays toward the room using fish tape or glow rods. Each fiber still needs a hole from below, and the fibers are pushed up and then pulled into position from the access point.
- Pros: keeps the original ceiling surface; minimal added depth.
- Cons: slow and fiddly; only practical when joists run the right direction and bays are clear of insulation, ducts, pipes and blocking; hard to secure the fibers; usually limited to smaller star counts.
- Best for: small rooms, accent zones and experienced installers.
In practice, for most homeowners with no attic, method 1, 2 or 3 will be faster and give a cleaner result than trying to fish hundreds of fibers through closed joist bays.
No-attic methods compared
| Method | Drywall removal? | Ceiling depth added | DIY difficulty | Finish | Best for |
|---|---|---|---|---|---|
| Surface-mount star panels | No | Low | Easy to moderate | Paneled field; acoustic options | Theaters, media rooms, condos |
| Floating star cloud | No | Moderate | Moderate | Architectural, with halo glow | Over beds, seating, booths |
| Build-down layer | No | Low to moderate | Moderate to advanced | Seamless painted ceiling | Bedrooms, living rooms, theaters |
| Tray / cove / soffit | No | Perimeter only | Advanced | High-end, with cove light | Master suites, theaters, lounges |
| Stretch fabric | No | Low | Professional | Very flat, hides old ceiling | Commercial, spas, luxury homes |
| Fish from one access point | Small opening | None | Advanced, slow | Original ceiling | Small rooms, accent zones |
Pricing for each method depends on room size, star count and fiber diameters, effects, panel type and the labor involved, so we quote each project individually. Our article on what drives star ceiling cost explains the main factors.
Where to put the light engine when there is no attic
The light engine is the one part of a fiber optic star ceiling that needs power, ventilation and occasional service. Without an attic, plan its location before anything else, because it decides how long the fibers must be and where the bundle runs. Common locations:
- An adjacent closet: the most popular choice in bedrooms. The engine sits on a shelf near the ceiling, and the fiber bundle passes through the wall or a soffit into the room.
- Inside a soffit or tray: with a service hatch or removable panel and enough airflow.
- Above a drop ceiling: in basements with a suspended grid, a nearby tile lifts out for access.
- In a cabinet or equipment rack: theaters and media rooms often put it in the AV closet or a ventilated cabinet, which also makes control integration easier.
- Inside a cloud frame: some cloud designs leave room for the engine within the frame, with a removable section for service.
- In an adjacent unfinished space: a mechanical room, garage wall or under-stair area next to the room.
Wherever it goes, keep it accessible, dry, ventilated and away from heat sources, and avoid tight bends or crushing in the fiber bundle where it passes through walls or framing. A quiet, well-ventilated engine matters in bedrooms and theaters, where fan noise is noticeable.
Measure the fiber route, not just the room. The farthest star is often much farther from the engine than you expect once the bundle goes around a corner, up a wall and across the ceiling. Running short on fiber length is the most common mistake on no-attic installs.
Get a star ceiling plan for your finished room
Send us your room dimensions, ceiling type and a photo, and Wiedamark LED will recommend panels, a build-down kit or an installation partner, with a project-specific quote.
What is the easiest way to build a star ceiling?
For a room with no attic, the easiest way to build a real fiber optic star ceiling is with plug-and-play star panels: the fibers are already installed, the panels mount to the existing ceiling, and the bundles plug into the light engine. You avoid drilling hundreds of holes overhead and threading fibers one by one.
Here is how a typical plug-and-play star ceiling installation goes:
- Plan the layout. Decide on full coverage, a centered field or a cloud. Mark joists so the mounting hardware lands in structure.
- Choose the engine location. Closet, soffit, cabinet or drop ceiling, within reach of every panel's fiber tail.
- Plan the fiber route. Decide where bundles will run between the panel field and the engine: along a cove, behind crown molding, in a soffit or through a wall chase.
- Install the mounting system. Fasten rails, clips or a frame to the ceiling according to the panel manufacturer's instructions.
- Hang the panels. Start from the center or a reference line so the field is square to the room.
- Gather and route the bundles. Protect fibers from sharp edges and avoid tight bends.
- Connect to the light engine. Seat the bundle in the engine's port, plug in or have an electrician wire it, and test.
- Set the effects. Adjust brightness, twinkle speed, color and any shooting-star or Milky Way zones.
If you prefer to work with a fiber kit rather than panels, the build-down method (method 3) is the next easiest, because you drill and thread the new boards on the floor instead of overhead. For a broader overview of systems and effects, see our complete starlight ceiling guide.
Star ceiling without drilling holes in the existing ceiling
A related question we see often is whether you can add stars without drilling into the existing ceiling at all. The answer depends on what counts as "drilling." Every fiber optic star needs a hole for its fiber tip, but that hole can be in a new surface rather than your current drywall:
- Pre-made panels arrive with the fiber holes already made; the only fasteners going into your ceiling are the mounting screws.
- Build-down boards are drilled on the floor; the furring is screwed to the ceiling, but the star holes are in the new layer.
- Stretch fabric uses a perimeter track; the stars pass through the membrane, not the old ceiling.
- Drop ceiling tiles simply replace standard tiles in the grid.
If you truly cannot fasten anything to the ceiling, for example in some rentals, the honest answer is that a star projector is the only zero-installation option. It is a very different effect, though, and our comparison of a fiber optic star ceiling vs an LED projector explains the trade-offs.
Ceiling types and what changes
Drywall under a second floor
This is the classic no-attic case: a first-floor bedroom, living room or theater with bedrooms above. Above the drywall are floor joists, often with ducts, plumbing, wiring and blocking in the way. Panels, a cloud or a build-down layer avoid that space entirely. Fishing fibers (method 6) is only realistic if a joist bay runs cleanly from an access point.
Basements with drop ceilings
A suspended grid is effectively your attic: lift a tile and you have access. Fiber optic star tiles drop into the grid in place of standard tiles, and the engine sits above the grid near an access tile. Our basement ceiling star lights guide covers drop ceilings, open joists and finished basements in detail.
Finished basements with drywall
Treat these like drywall under a second floor: panels, a cloud or a build-down layer. Basements often have soffits for ducts already, which can hide the light engine and fiber runs.
Concrete ceilings (condos, lofts, commercial)
You cannot route fibers through a slab, so the stars must go into a new layer. Panels or a framed build-down fastened with appropriate concrete anchors, or a stretch fabric system on a perimeter track, are the usual answers. Check building rules before fastening into a shared slab in a condo.
Vaulted and sloped ceilings
Vaulted ceilings rarely have usable attic space above the slope. Build-down layers and panels follow the slope; plan the fiber route along the ridge or down the side walls to an engine in a knee wall or closet.
Textured or popcorn ceilings
A new surface (panels, build-down or fabric) hides the texture entirely. If an older textured ceiling may contain hazardous materials, have it tested before disturbing it.
Planning checklist for a no-attic star ceiling
- Ceiling height: how much depth can you give up for panels, a cloud or a build-down without the room feeling low?
- Coverage: full ceiling, a centered field, a cloud or a single feature zone over the bed or seating?
- Joist direction and locations: mounting hardware and furring should land in structure.
- Engine location: accessible, dry, ventilated, with power nearby.
- Fiber route and length: measured end to end, with extra length allowed.
- Star density and diameters: a mix of bright and faint stars looks most natural.
- Effects: steady, twinkle, color, shooting stars, Milky Way or constellations.
- Controls: remote, wall control, app or integration with theater and smart-home systems.
- Other ceiling items: speakers, recessed lights, smoke detectors, sprinklers, HVAC registers and access panels.
- Codes and approvals: local building, electrical and fire rules, plus HOA or building management approval in condos and commercial spaces.
For design inspiration room by room, see our star light bedroom ceiling ideas, the star light effects guide and our overview of LED star ceiling lights.
DIY or professional without an attic?
A no-attic star ceiling is more of a construction project than an attic install, so be realistic about the work:
- Good DIY candidates: plug-and-play panels in a small or medium room, a drop-ceiling tile swap in a basement, or a small cloud over a bed, if you are comfortable locating joists and working on a ladder.
- Worth a professional: full-ceiling build-downs with a seamless finish, tray and soffit builds, stretch fabric, vaulted ceilings, concrete ceilings, theaters with acoustic requirements, and any commercial space.
- Always a licensed electrician: any new circuit, hard-wired engine or outlet inside a soffit or closet.
Wiedamark LED supplies the components, kits and panels and helps size the system, and for custom installation we refer projects to our partner American Starlight Ceilings. Our licensed installation partner has completed over 200 major sports and commercial projects across the US and Canada — NFL, NBA, NHL, MLS, NCAA and NASCAR.
Common mistakes to avoid
- Picking the engine location last. It decides fiber lengths and the bundle route; plan it first.
- Underestimating fiber length. Measure the real route around corners and down walls.
- Mounting into drywall only. Panels, clouds and furring need to be anchored into joists or structure.
- Crushing or kinking the bundle where it passes through a wall, top plate or soffit corner.
- Forgetting service access to an engine inside a soffit or cloud.
- Ignoring other ceiling devices. Smoke detectors, sprinklers and HVAC registers must stay functional and code-compliant.
- A uniform grid of stars. Randomize placement and mix diameters so the sky looks natural.
Why work with Wiedamark LED
Wiedamark LED supplies fiber optic starlight ceiling components and kits, star panels, fiber optic lighting and commercial and architectural LED products, with trade pricing for contractors, designers and integrators. Our team brings 15+ years as an authorized architectural lighting dealer and project coordinator. Tell us about your room and ceiling, and we will help you choose between panels, a cloud, a build-down kit or a referral to an installer. For hotels, venues and other large projects, our sister company WDM Lighting takes on large-scale work. You can also browse our starlight ceiling products, our lighting product categories and our Luminance design-build program.
New to star ceilings? Start with what LED star light ceilings are and how they work, then come back here to plan your no-attic install. More guides are on the Wiedamark LED blog.
Frequently Asked Questions
Can you install a star ceiling without attic access?
What is the easiest way to build a star ceiling?
Can I add a star ceiling without removing drywall?
Can I make a star ceiling without drilling holes?
Where does the light engine go if there is no attic?
How much ceiling height do I lose with a no-attic star ceiling?
Is a plug-and-play star ceiling as realistic as a custom fiber optic ceiling?
Can I put a star ceiling on a concrete ceiling?
Do I need an electrician for a star ceiling without an attic?
Where can I get panels or a kit for a finished ceiling?
Stars overhead, no attic required
Tell us about your room and ceiling, and we will recommend the right no-attic method and follow up with a quote. Prefer to talk it through? Schedule a call.
Related
Our lighting network: starlight ceiling installation, 360° fiber optic lighting, premium pool lighting, WDM Lighting large projects, Dallas commercial LED lighting, Texas LED lighting, Plano LED lighting, LED signage, modular building solutions and Dallas modular structures.