DIY Star Ceiling: How to Install a Fiber Optic Star Ceiling Kit Step by Step
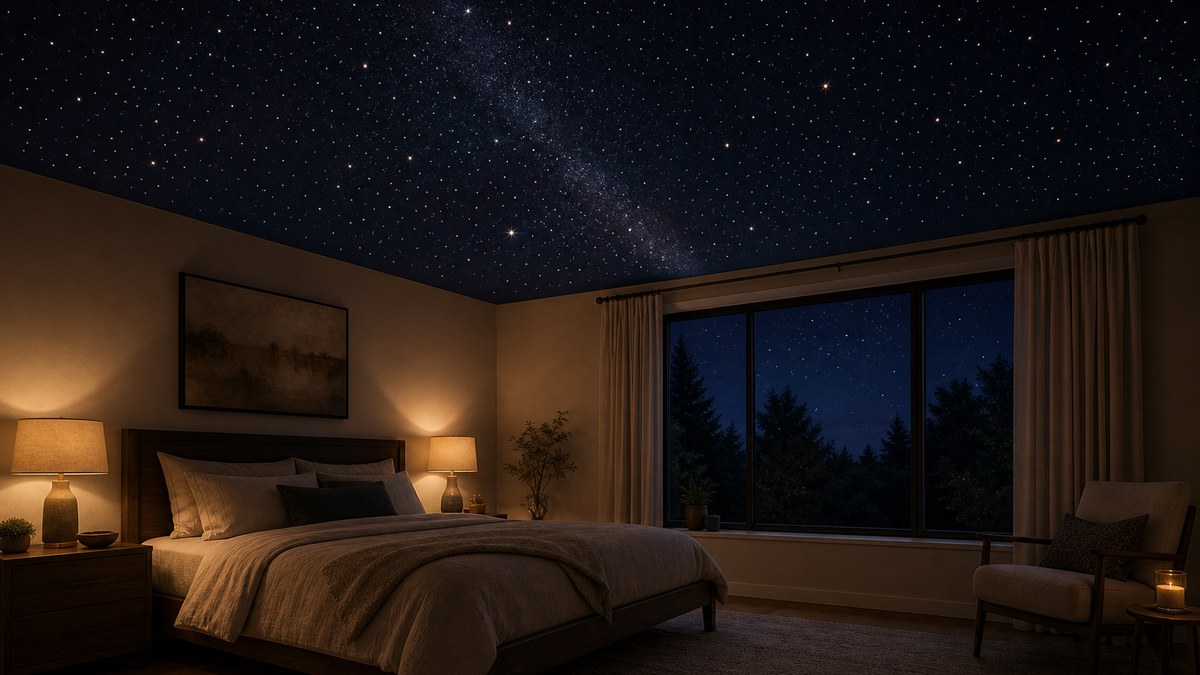
A DIY star ceiling is one of the most rewarding lighting projects you can take on at home. With a fiber optic star ceiling kit, a drill, some patience and access above the ceiling, you can turn a bedroom, kids' room, media room or basement into a quiet night sky that glows every evening. Done well, a home-built fiber optic ceiling can look surprisingly close to a professional installation. Done in a hurry, it looks like a grid of dots.
This guide walks through the whole process the way an experienced installer would plan it: how fiber optic star kits work, whether DIY is right for your ceiling, what tools you need, how to lay out stars so they look natural, how to drill, thread, glue and trim the fibers, where to put the light engine, and the mistakes that ruin most first attempts. It also covers plug-and-play star panels as an alternative and what really drives the cost of a DIY star ceiling, so you can decide before you buy.
To make a DIY star ceiling, you mount a fiber optic light engine in a dry, ventilated spot (usually the attic or a closet), drill small holes in the ceiling, push one fiber through each hole from above, secure it, then trim every fiber flush with the ceiling so each tip glows as a star.
- Best for: bedrooms, kids' rooms, small media rooms and accent ceilings with attic or drop-ceiling access
- Key to realism: mix several fiber diameters and place stars randomly, never in rows
- Hardest part: threading hundreds of fibers and getting enough fiber length to reach every corner
- No access above? Use pre-made star panels or a second ceiling layer instead of drilling drywall blind
- Pricing: depends on fiber count, light engine, effects and ceiling size; request a quote for your room
How a fiber optic star ceiling kit works
Every fiber optic star ceiling, from a small kit to a large commercial sky, uses the same three parts. Understanding them makes the rest of the project much easier, and it explains why planning matters more than drilling. For a deeper explanation, see our guide to how LED star light ceilings work.
- Light engine (illuminator): a box with an LED light source that shines into the end of a fiber bundle. It provides brightness, color and effects such as twinkle. It needs power and ventilation, so it lives somewhere accessible rather than inside the ceiling surface.
- Fiber optic harness: a bundle of thin plastic (PMMA) fiber strands gathered into a common end that plugs into the light engine. Each strand carries light to its tip. Kits often include several diameters so you get bright and faint stars.
- Ceiling surface: drywall, a drop-ceiling tile, an acoustic panel or a sheet of plywood or MDF. Each fiber passes through its own small hole and is cut flush. The cut end is the star.
Because fibers carry light rather than electricity, nothing at the ceiling surface gets hot or carries current. That is why fiber optic stars are used in bathrooms, saunas and spas, as long as the light engine itself stays in a dry, ventilated location outside the wet area.
Twinkle: wheels vs electronic
Twinkle is what makes a ceiling feel alive. Some light engines spin a patterned wheel between the LED and the fiber bundle so that light to each fiber flickers slightly. Others vary the LED electronically. Either way, twinkle only looks natural if neighboring stars come from different parts of the bundle, which is why "shuffling" the fibers during installation (covered below) is so important. Our starlight effects guide explains twinkle, shooting stars, color and Milky Way effects in more detail.
Is a DIY star ceiling right for your room?
A DIY fiber optic ceiling is very achievable, but not every ceiling is a good candidate. Before buying a kit, check these four things.
1. Do you have access above the ceiling?
This is the single biggest factor. With an attic above a drywall ceiling, you can drill from below and feed fibers down from above. With a drop ceiling, you remove tiles, drill them on a bench and drop them back in. With open joists (common in unfinished basements), you can route fibers before the ceiling goes up. A finished ceiling with a room above and no access is the hardest case; most people use surface-mounted star panels or add a thin second ceiling layer instead.
2. How big is the area?
Small and medium rooms are ideal for a first project. Large rooms and theaters take far more fibers, longer fiber runs, more than one light engine and many more hours of threading. Many homeowners start with an accent area, such as a tray ceiling, the area above the bed or a floating panel, rather than the whole ceiling.
3. What effects do you want?
Steady stars and twinkle are straightforward in a DIY build. Shooting stars, Milky Way bands, constellation maps and multi-zone control need more planning and sometimes separate light engines or dedicated fiber paths. If those effects are must-haves, read our complete starlight ceiling guide before committing to a kit size.
4. How patient are you?
Be honest about this one. The work is simple but repetitive: drill, thread, secure, repeat, hundreds of times, often from a ladder or a hot attic. People who enjoy careful, methodical projects love the result. People who want it done in an afternoon usually prefer star panels or professional installation.
| Ceiling situation | DIY approach | Difficulty | Notes |
|---|---|---|---|
| Drywall with attic above | Drill from below, feed fibers from the attic | Moderate | The classic DIY star ceiling; plan attic work for a cool day |
| Drop ceiling (grid and tiles) | Drill tiles on a bench, thread, reinstall | Easiest | Great for basements; you can do one tile at a time |
| Open joists / new construction | Route fibers before drywall, drill and pull through after | Moderate | Mark fiber bundle locations carefully before closing up |
| Finished ceiling, no access | Surface-mounted star panels or second ceiling layer | Moderate to hard | Avoid drilling blind into a finished ceiling |
| Vaulted or very large ceiling | Panels or professional design help | Hard | Fiber length and engine sizing become critical |
DIY star ceiling kit vs plug-and-play star panels
"Plug and play" star ceiling installation usually means pre-made star panels: acoustic, fabric-wrapped or rigid panels with the fibers already installed and trimmed, plus a light engine that connects to the panel harness. You mount the panels to the ceiling or drop them into a grid, plug the harness into the engine and power up. There is no hole-by-hole threading.
- DIY kit: more labor, more control over layout, works directly in your own drywall or tiles, and the stars sit flush in the ceiling itself.
- Pre-made panels: far less labor, consistent results, acoustic panels can improve sound in theaters, and they solve the "no access above" problem. The panels themselves become a visible design element.
- Hybrid: some people use panels for the main field and add individual fibers around the edges, or build their own panels from plywood or MDF on a bench, then mount them.
If you are comparing the two, our LED star ceiling lights guide compares fiber optic stars, panels and projectors side by side.
Tools and materials you will need
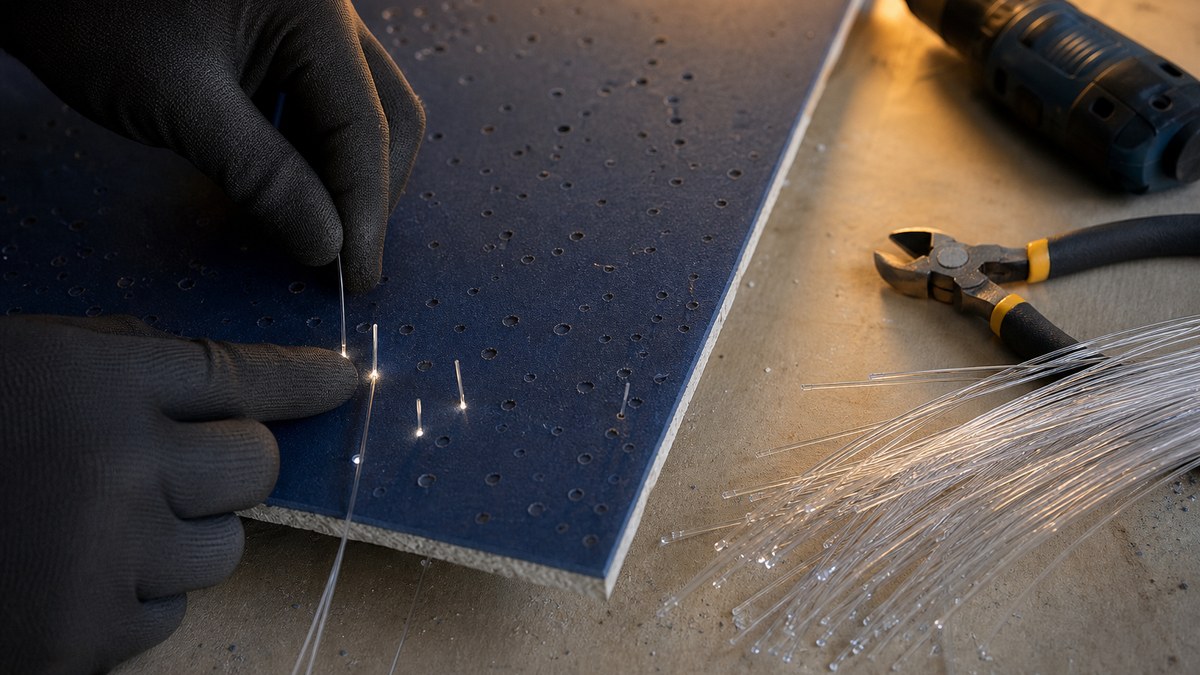
Kits vary, but almost every DIY fiber optic star ceiling uses the same toolkit. Gather everything before you start so you are not climbing down the ladder every ten minutes.
- Fiber optic star ceiling kit: light engine, fiber harness (ideally in several diameters) and remote or controller.
- Drill and small bits: sized just slightly larger than each fiber diameter. Test on a scrap piece first so fibers fit snugly without forcing.
- Ceiling paint (optional but recommended): a dark navy or near-black flat finish makes stars pop and hides holes. Paint before you drill and thread.
- Pencil, chalk or painter's tape and a layout sketch to mark star positions and zones.
- Adhesive: a flexible adhesive such as a hot glue gun or silicone, applied from above where each fiber exits the hole (some installers rely on a snug friction fit for small fibers).
- Flush cutters or a sharp blade for trimming fibers at the ceiling surface after everything is secured. Some kits recommend a hot knife for a clean, bright tip.
- Cable ties or fiber clips to organize bundles in the attic without crushing them.
- Safety gear: eye protection, a dust mask, gloves and knee pads for the attic, plus a stable ladder and good work lighting.
- A helper (strongly recommended): one person in the attic feeding fibers and one in the room guiding them through the holes cuts the time dramatically.
How to install a DIY star ceiling step by step
These are the steps experienced installers follow. Take your time on steps 1 to 3; they decide how good the finished ceiling looks.
Step 1: Plan the layout on paper
Sketch the ceiling to scale. Mark lights, vents, smoke detectors, fans and joists. Decide where your densest areas will be (for example, a soft diagonal Milky Way band or a cluster above the bed) and where the sky should thin out. If you want a constellation, mark it now. Count how many fibers of each diameter you have so the plan matches the kit.
Step 2: Choose the light engine location
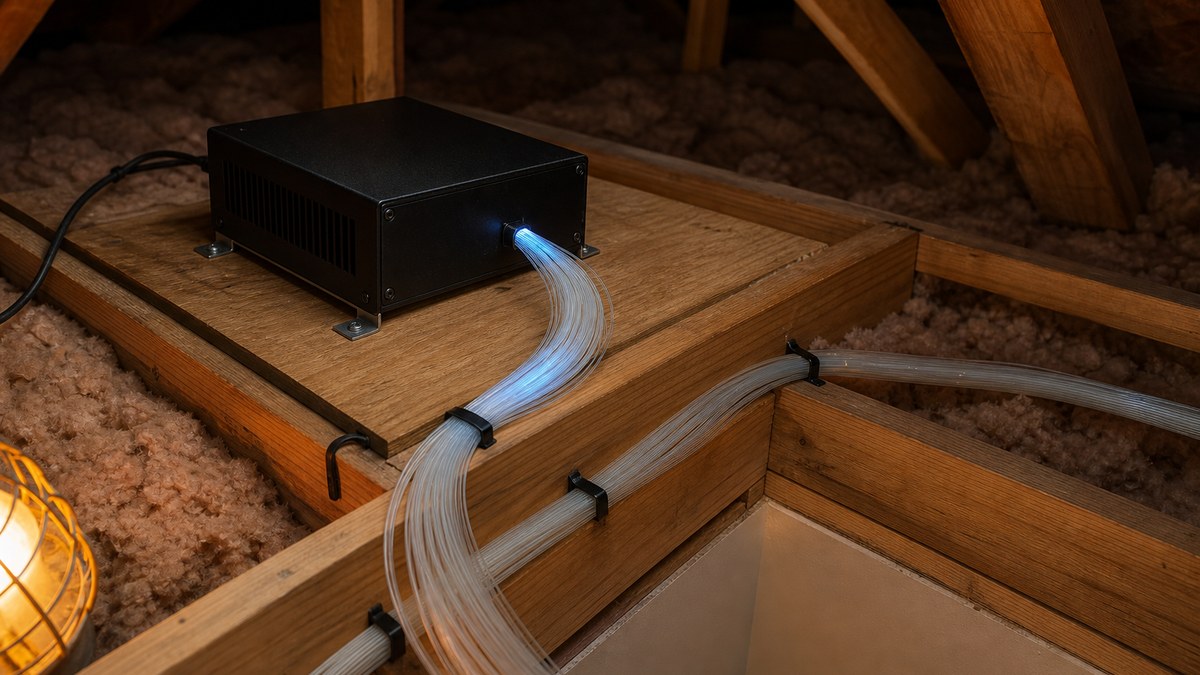
The engine should be dry, ventilated, accessible for future service, close to a power source and central enough that fibers can reach every corner. Common spots are the attic just above the room, a closet shelf, a mechanical room or above a drop ceiling. Measure the real fiber route from the engine to the farthest star, including the path over joists, and compare it to your harness length. Running short at the far corner is the most common DIY mistake.
Step 3: Paint and mark the ceiling
If you are painting the ceiling a darker color, do it first. Then mark star positions lightly. Randomness is everything: scatter marks unevenly, leave a few empty patches and avoid lining anything up with walls or joists. A trick many people use is to toss a handful of rice onto a sheet of paper and copy the pattern. Mark bright stars sparingly; most of the sky should be faint stars.
Step 4: Drill the holes
Drill straight up, with a bit sized for each fiber diameter. Keep holes small so they disappear when the stars are off. Work in sections so you can thread as you go rather than drilling the whole ceiling at once and losing track of which hole matches which fiber size. For drop-ceiling tiles, drill on a bench with the face up and support the tile underneath to avoid chipping.
Step 5: Shuffle and feed the fibers
Before threading, separate the harness and mix strands from different parts of the bundle so neighboring stars do not twinkle in unison. Then, working from above, push one fiber down through each hole, leaving a few inches hanging below the ceiling. Your helper below can guide each fiber through and confirm the size matches the mark. Avoid sharp bends and kinks; a gentle curve keeps light flowing to the tip.
Step 6: Secure each fiber
From above, secure each fiber where it enters the hole with a small dab of flexible adhesive, or rely on a snug friction fit if your kit is designed for it. Keep adhesive off the visible face of the ceiling. Organize the runs back to the engine with loose cable ties or clips; never cinch bundles tight enough to crush fibers, and keep them away from sharp edges and anyone walking in the attic.
Step 7: Connect the harness to the light engine
Insert the common end of the harness into the engine's port as the kit instructions describe, make sure it is fully seated and secure the engine so it cannot slide or tip. Leave clear space around its vents.
Step 8: Trim the fibers flush
With everything secured, trim each fiber flush with the ceiling using flush cutters, a sharp blade or a hot knife. A clean, square cut gives a crisp, bright point. Rough cuts look dull. Some installers trim with the engine on so they can see each star as it is cut.
Step 9: Test, tune and clean up
Power up, check that every star lights, and set brightness, twinkle speed and color. Look for dark spots or overly bright clusters and fix them now while you still have access. Then vacuum dust from the attic area and the room.
Not sure which kit fits your ceiling?
Send us your room size, ceiling type and the effects you want, and we will recommend fiber counts, diameters and a light engine — or a pre-made panel option.
Design tips that make a DIY ceiling look professional
- Use at least two or three fiber diameters. A few bright anchor stars over a field of faint ones looks like a real sky. One diameter looks flat.
- Never use a grid. Real skies cluster and thin out. If you can see a pattern, randomize more.
- Darken the ceiling. Navy, charcoal or black hides holes and increases contrast. A white ceiling works, but stars look softer.
- Add a Milky Way band. A soft diagonal band of dense, small fibers instantly reads as night sky.
- Frame the sky. Tray ceilings, coves and floating panels give the stars a "horizon." A dim perimeter glow adds depth.
- Keep other lights on dimmers. Stars look best when the room is dark; put room lighting on dimmers or scenes.
- Personalize it. Map a birthday or anniversary constellation in one area as a focal point.
For bedroom-specific layouts, see our star light bedroom ceiling ideas. For drop ceilings and open joists, our basement ceiling star lights guide covers star tiles and routing.
Common DIY star ceiling mistakes to avoid
- Running out of fiber length. Measure the actual route through the attic, not the room dimensions, and add slack.
- Placing stars in rows or even spacing. It is the fastest way to make a ceiling look artificial.
- Skipping the shuffle. Unshuffled fibers make whole areas twinkle together like a blinking sign.
- Sharp bends and crushed bundles. They dim or kill individual stars. Route fibers in gentle curves and keep them off walkways.
- Hiding the light engine. Sealing it in a cavity with no airflow or access makes future service painful. Keep it ventilated and reachable.
- Poor trimming. Ragged cuts look dull. Trim cleanly and flush.
- Glue on the ceiling face. Adhesive smears catch light and show. Apply from above only.
- Buying a kit that is too small. A sparse ceiling looks unfinished. Size the fiber count to the area you actually want covered, or reduce the area rather than spreading stars too thin.
- Ignoring sightlines in media rooms. Keep bright stars and shooting star paths away from the screen wall.
What drives the cost of a DIY star ceiling?
People search for "DIY star ceiling cost" because they want to know whether doing it themselves is worth it. Wiedamark LED quotes every project individually, because cost depends on choices that differ from room to room. These are the factors that move the number:
- Fiber count: more stars means more fiber and more labor.
- Fiber diameters and lengths: larger diameters and longer runs to far corners increase material.
- Light engine: single-color vs color-changing, twinkle type, brightness rating and controls.
- Effects: shooting stars, Milky Way bands and multiple zones often need extra engines or dedicated fibers.
- Ceiling surface: drilling drywall you already have vs buying star tiles, acoustic panels or a second layer.
- Your time: the labor you save with DIY is real, but so are the hours of threading.
- Electrical work: a new outlet or hard-wired connection by a licensed electrician.
Our article on what drives star ceiling cost goes deeper into DIY vs panel vs professional pricing factors. For a project-specific quote, contact us with your room size and wish list.
When to choose professional installation instead
DIY makes sense for many bedrooms and small rooms. Professional installation is usually the better call when:
- The ceiling is finished with no access above, vaulted or very large.
- You want a dense theater sky with shooting stars, a Milky Way and constellation mapping.
- The project is commercial: restaurants, bars, lounges, hotels and spas involve building codes, fire ratings and durable controls.
- You want the ceiling integrated with a home theater or smart-home control system.
For custom installation, Wiedamark LED works with our partner American Starlight Ceilings. Our licensed installation partner has completed over 200 major sports and commercial projects across the US and Canada — NFL, NBA, NHL, MLS, NCAA and NASCAR. For large hospitality and architectural projects, our sister company WDM Lighting handles whole-building lighting. Browse our commercial and architectural LED services and fiber optic lighting as well.
Care and maintenance after installation
- Dust the ceiling occasionally with a soft brush or a vacuum on low; do not scrub the fiber tips.
- Keep the light engine's vents clear and the space around it dry.
- If the whole ceiling dims or changes color unexpectedly, check the light engine first; the fibers have no bulbs.
- If one star goes dark, the fiber is usually kinked, crushed or pulled back from the hole; check it from above.
- Tell anyone working in the attic later where the fiber bundles run.

Why source your kit from Wiedamark LED
Wiedamark LED supplies fiber optic starlight ceiling components and kits, fiber optic lighting, and commercial and architectural LED products for homeowners and the trade nationwide, with trade pricing for contractors, designers and integrators. Our team brings 15+ years as an authorized architectural lighting dealer and project coordinator. We help you size the system before you buy: fiber count, diameters, lengths and the right light engine for your room. See our starlight ceiling components, services and gallery, learn about our Luminance program, or browse more guides on the Wiedamark LED blog. Have a quick question? Book a call.
Frequently Asked Questions
Can I install a fiber optic star ceiling myself?
How do you make star lights on a ceiling?
How long does a DIY star ceiling take?
What size holes do I drill for fiber optic stars?
Is a DIY star ceiling kit or a pre-made star panel better?
How much does a DIY star ceiling cost?
Where should the light engine go?
Do I need an electrician for a star ceiling kit?
Why do my stars all twinkle at the same time?
Can I put a DIY star ceiling in a bathroom?
Build your own night sky
Tell us your room size, ceiling type and the effects you want, and we will recommend a DIY star ceiling kit, star panels or an installation partner, with a project-specific quote.
Related
Our lighting network: starlight ceiling installation, 360° fiber optic lighting, premium pool lighting, WDM Lighting large projects, Dallas commercial LED lighting, Texas LED lighting, Plano LED lighting, LED signage, modular building solutions and Dallas modular structures.