Star Ceiling Installation: How a Fiber Optic Starlight Ceiling Is Installed, Step by Step, and How to Choose an Installer
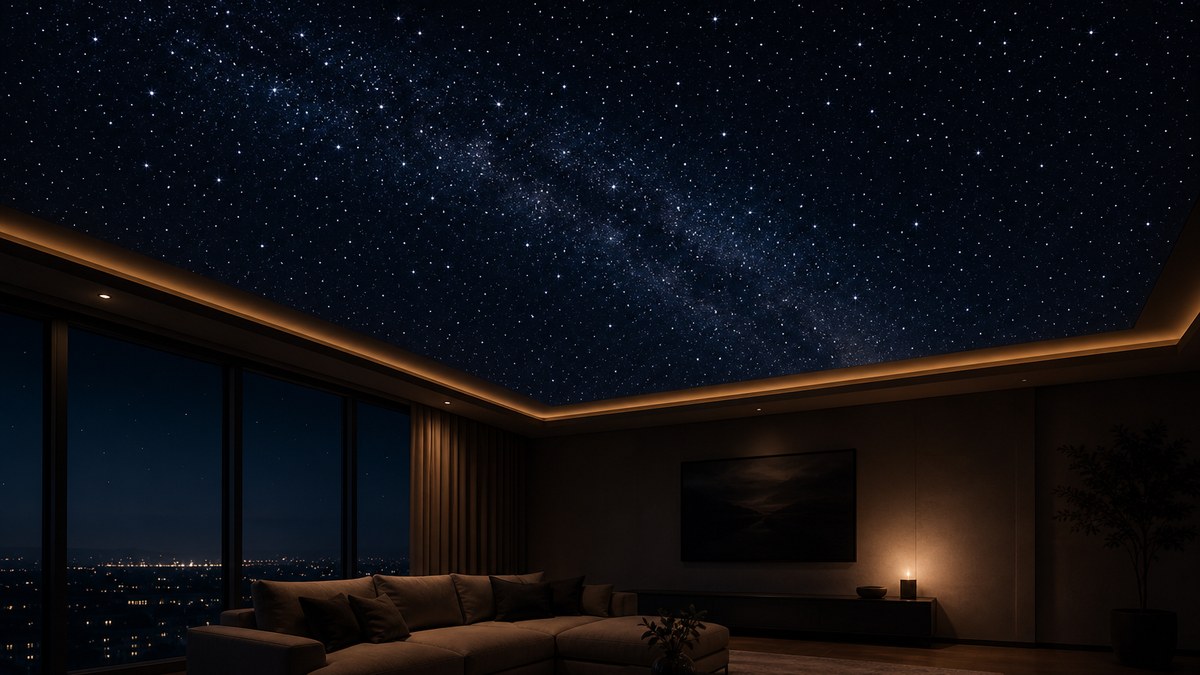
Star ceiling installation is the part of a starlight project most people underestimate. The finished ceiling looks effortless: hundreds of pinpoint stars, a slow twinkle, maybe a shooting star crossing the room. What makes it look that way is planning, routing and careful fiber work that happens above the ceiling, where nobody ever looks again.
This guide walks through how a fiber optic starlight ceiling is installed from first measurement to final trim. It covers the three main installation methods (drilling into drywall from above, mounting pre-made star panels, and building down a new ceiling layer), how new construction differs from a retrofit, what happens on installation day, how long each phase usually takes, and how to choose a starlight ceiling installer. It is written for homeowners, designers, builders, AV and theater integrators, and electrical contractors who want to know what a good install looks like before they commit.
If you are planning to do the work yourself, read our step-by-step DIY star ceiling kit guide as well. This article focuses on the full process and on the decisions that shape it, whether you hire a pro or not.
A fiber optic star ceiling is installed by mounting an LED light engine in an accessible, ventilated spot, running bundles of fiber strands to the ceiling, passing each fiber through a small hole (or into a pre-made panel), shuffling the fibers so neighboring stars twinkle independently, then trimming every fiber flush and testing the effects.
- Three install methods: drill from above (attic or open joists), pre-made star panels, or a build-down second ceiling layer
- Easiest case: new construction or open joists before drywall goes up
- Hardest case: finished ceiling with no attic access, which usually calls for panels or a build-down
- Key decisions: light engine location, fiber length, star density, effects and controls
- Electrical: light engines plug in or connect to a standard circuit; hard-wired work goes to a licensed electrician
- Pricing: quote-only, based on ceiling size, method, star count, effects and labor
What a star ceiling installation actually involves
Every fiber optic star ceiling has the same three parts, and installation is simply the job of putting them together cleanly. If you want the deeper technical background, our explainer on how starlights work covers light engines and twinkle wheels in detail.
- The light engine (illuminator): a box containing an LED light source, the twinkle mechanism and the color and dimming electronics. It usually lives in the attic, a closet, a soffit or above a drop ceiling.
- The fiber harness: a bundle of thin fiber optic strands, often in several diameters, joined into a common end that plugs into the light engine. The fibers carry light only, with no electricity and no heat at the ceiling.
- The ceiling surface: drywall, star panels, acoustic tiles, a stretch fabric system or a new layer of board. Each fiber tip ends flush with this surface and becomes one star.
Installation quality is measured in details you only notice when they go wrong: stars in a visible grid, a dark patch in a corner where the fibers did not reach, a light engine fan humming over a bed, or a twinkle that pulses in big obvious waves. A good installer plans those problems out before the first hole is drilled.
The three main installation methods
1. Drilling into drywall from above
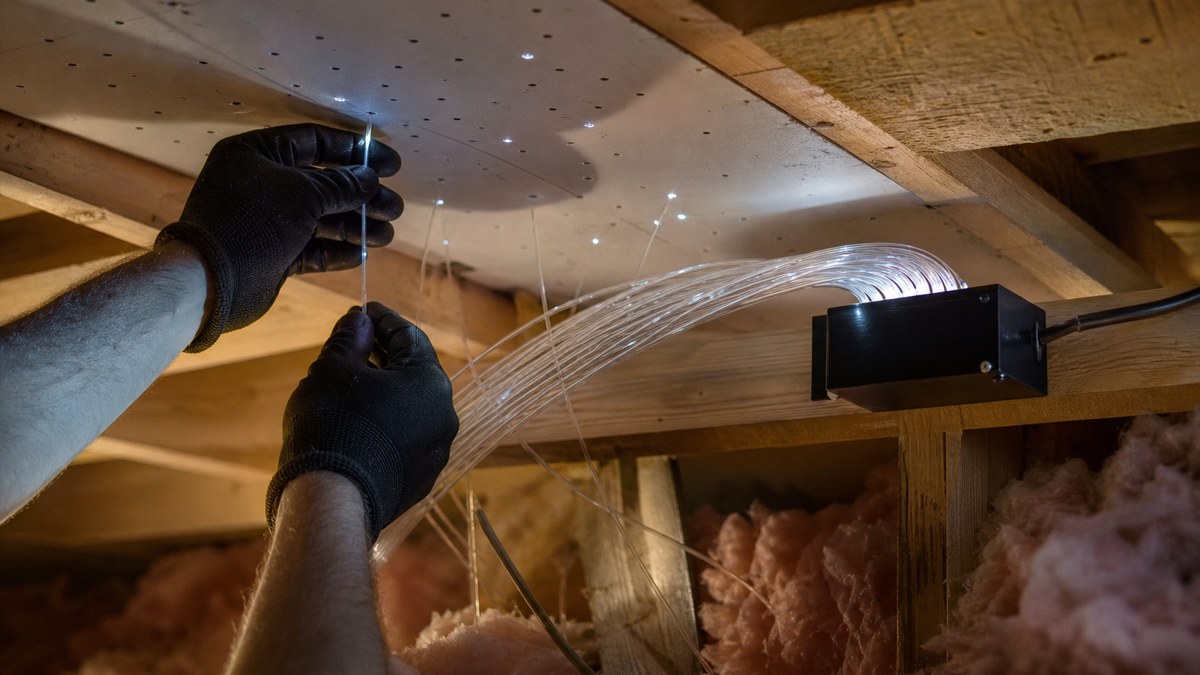
This is the classic method for an existing home with attic access. The installer marks the star layout on the room side, drills small holes through the drywall, then works from the attic to feed fibers down through each hole. Fibers are left long, glued or friction-fit, and trimmed flush at the end. It produces the most natural result because stars sit directly in the original ceiling, but it requires safe, workable attic access above the whole room and patience with insulation.
2. Pre-made star panels
Star panels arrive with the fibers already installed. They mount to an existing ceiling, drop into a suspended grid, or float below the ceiling as a framed cloud. Most of the fiber work happens before the panels reach the job site, so on-site labor is lower and the install is cleaner. Panels are the go-to for finished ceilings, basements with drop ceilings and home theaters that need acoustic treatment. Our star ceiling panels guide compares panel types in depth.
3. Build-down (second ceiling layer)
When there is no access above a finished ceiling, an installer can fasten furring strips or a light frame to the existing ceiling, run the fibers in that new cavity, and close it with a new layer of board or panels. The ceiling drops slightly, but nothing has to be torn out. We cover this and five other options in our guide to a star ceiling without attic access.
| Method | Best for | Access needed | Disruption | Trade-offs |
|---|---|---|---|---|
| Drill from above | Existing homes with attics, single-story rooms | Attic or crawl space over the whole ceiling | Low in the room, high in the attic | Most natural look; slow, physical attic work |
| Open joists (new build) | New construction, remodels, unfinished basements | Ceiling open before drywall | Fits into the build schedule | Needs coordination with the drywall crew |
| Pre-made star panels | Finished ceilings, theaters, drop ceilings | None above; route for the fiber tails | Low | Panel seams and sizes shape the layout |
| Build-down layer | Finished ceilings without attic access | None above | Moderate, like a small drywall job | Slightly lower ceiling; trim details at walls |
| Stretch fabric ceiling | Commercial lounges, curved or large spans | Perimeter track and cavity | Moderate | Specialist install; seamless finish |
New construction vs retrofit
The single biggest factor in how smoothly a star ceiling installation goes is timing.
New construction and remodels
If the ceiling is still open, this is the ideal window. The light engine location can be framed in, a dedicated outlet or circuit can be planned with the electrician, and fibers can be routed and secured across open joists before drywall. Some installers drill and thread right after the board goes up; others pre-drill boards before they are hung. Either way, tell your builder early: the drywall, paint and electrical crews all touch the star ceiling, and a two-minute conversation saves a lot of rework.
Retrofit into an existing room
In a finished room the questions are access and dust. With a walkable attic, the drill-from-above method works well. With a second floor above, a low-pitch roof or a finished ceiling, panels or a build-down are usually faster and cleaner. Furniture is moved or covered, floors are protected, and the room is out of use for the working days.
Star ceiling installation step by step
Here is how a typical fiber optic starlight ceiling installation runs, whichever method is used. Small rooms may combine steps; large and commercial projects may break them into several visits.
- Site visit and measurements. Room dimensions, ceiling height and shape, access above, existing lights, vents and speakers, and where power is available.
- Design the sky. Star density, mix of fiber diameters, bright anchor stars, any constellation map, Milky Way band and shooting star paths, plus which areas stay sparse.
- Choose and size the light engine. Match the engine to the fiber count and effects, decide on color (white or RGB/RGBW), and plan the control: remote, app, wall control or a smart-home or theater system.
- Pick the engine location. Dry, ventilated, serviceable and within reach of the farthest stars. Bedrooms and theaters also need it far enough away that any fan noise is not heard.
- Measure fiber routes. Measure the actual path from the engine to the far corners through the attic or ceiling cavity, not the straight-line room size, and add slack for routing and trimming.
- Prepare the ceiling. Protect the room, clear insulation where needed, install furring for a build-down, or mount panel brackets and grid.
- Mark and drill. Transfer the star layout to the ceiling and drill small holes matched to each fiber diameter. Random placement and varied spacing keep the sky from looking like a grid.
- Thread the fibers. Feed fibers through each hole from above (or connect panel tails), leaving them long. Fibers from different parts of the bundle are mixed across the ceiling.
- Secure the runs. Support bundles so they do not sag, kink or sit on sharp edges, and keep bend radii gentle so light is not lost.
- Connect the engine. Insert the common end into the light engine port and connect power, following local electrical code.
- Trim flush. Cut each fiber flush with the ceiling using a sharp cutter so every tip reads as a clean point of light.
- Test and tune. Power up with the room dark, check for dead or overly bright stars, set twinkle speed, brightness, color and scenes, and walk the owner through the controls.
Many light engines create twinkle by modulating light across sections of the fiber bundle. If fibers from one section all end up side by side, a whole patch of the ceiling pulses together. Spreading fibers from every part of the bundle across the room makes each star twinkle on its own, which is what makes the sky read as real.
How long does a star ceiling installation take?
Timelines vary with room size, star count, method and access, so treat these as typical ranges rather than promises:
- Planning and design: one conversation for a simple bedroom; a few rounds for a theater with a mapped constellation and Milky Way.
- Lead time for components or panels: depends on the system and whether panels are made to order. Ask for this up front.
- On-site work: a small room with good attic access is often a one- to two-day job for an experienced crew. Large rooms, dense layouts, build-downs and commercial spaces take longer.
- Panels: usually the fastest on site, because the fiber work was done before delivery.
- DIY: plan on a weekend or more for a small room; threading and trimming hundreds of fibers takes patience.
The most common cause of delays is not the fiber work. It is discovering on the day that the attic is not walkable, the engine location has no power, or the fibers will not reach the far wall. A good site visit removes those surprises.
Planning a star ceiling installation?
Send us the room size, a photo of the ceiling, and whether you have attic or drop-ceiling access. We will recommend components, panels or a kit, and connect you with an installation partner if you need one.
Installation by room and ceiling type
Bedrooms
Bedrooms suit the drill-from-above method well, because most bedrooms sit under an attic. Keep the light engine away from the headboard wall so any fan noise is not heard, and put the stars on a remote or timer. See our star light bedroom ceiling ideas for layouts.
Home theaters
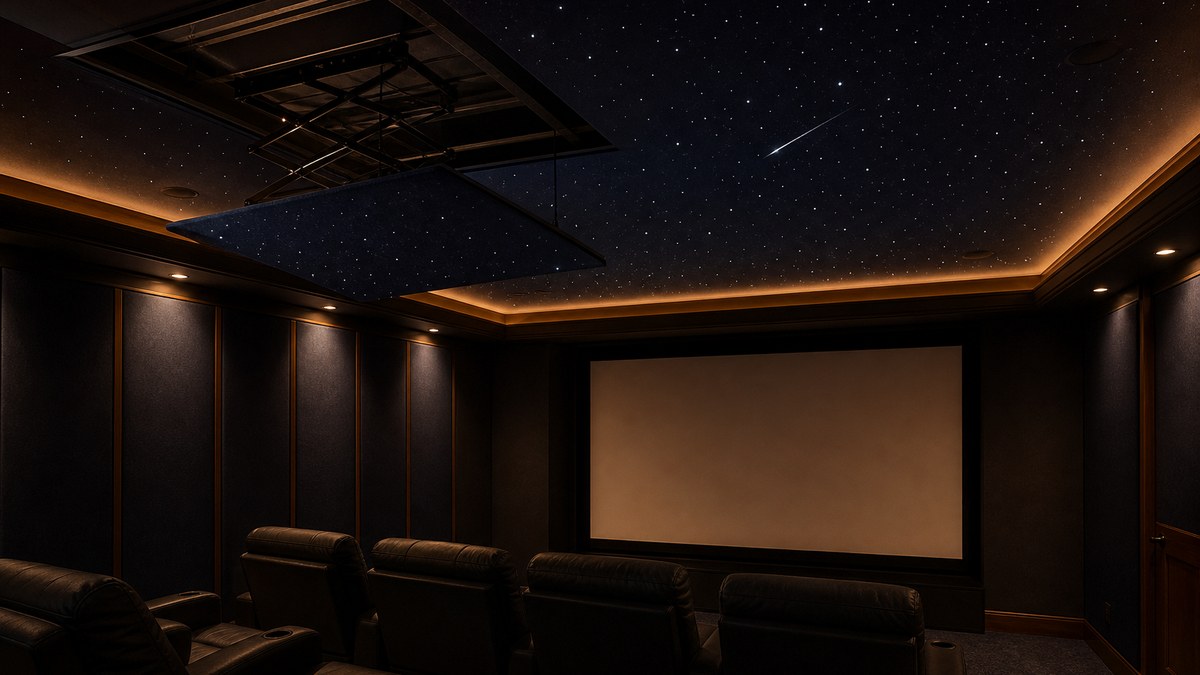
Theaters often use acoustic star panels, a floating cloud or a tray with a perimeter glow. Coordinate with the AV integrator on speaker locations, projector sightlines and control integration so the stars dim with the movie. Our home theater star ceiling design guide goes further.
Basements
Drop ceilings can take star tiles that swap in for standard tiles, while open joists are the easiest case of all. Finished basement ceilings usually go with panels or a build-down. Read the basement ceiling star lights guide for each option.
Vaulted and tray ceilings
Vaults look spectacular with a Milky Way band running along the slope, but fiber lengths and access are harder to plan. Tray ceilings frame the sky naturally and give a place to hide a cove light that acts as a horizon.
Bathrooms, spas and saunas
Fibers carry no electricity, which makes them well suited to wet and warm rooms. The light engine must be mounted outside the wet area in a dry, ventilated spot, and all electrical work must follow local code.
Restaurants, bars, lounges and hotels
Commercial installs add fire and building code review, larger areas split across several engines, scene control that staff can run, and scheduling around opening hours. For whole-building or hospitality projects, our sister company WDM Lighting handles large projects, and our commercial and architectural LED team supplies fixtures and controls.
How to choose a starlight ceiling installer
Searches for a "starlight ceiling installer" usually turn up a mix of AV integrators, electricians, drywall contractors and dedicated star ceiling specialists. Any of them can do good work. What matters is whether they have done this specific job well before. Ask these questions:
- Can I see finished star ceilings you installed? Photos taken in the dark, ideally with close-ups, show whether stars are random, varied and flush.
- Which method do you recommend for my ceiling, and why? A good installer explains the trade-off between drilling, panels and a build-down for your room.
- Where will the light engine go? Listen for dry, ventilated, serviceable, and away from bedrooms or theater seating if it has a fan.
- How do you handle fiber shuffling and density? If they do not mention mixing fibers or varying diameters, keep asking.
- Who does the electrical work? Hard-wired connections, new outlets and commercial work belong with a licensed electrician.
- What effects and controls are included? Twinkle, shooting stars, color, Milky Way, constellation mapping, remote or system integration: confirm what is in the quote and what is an add-on.
- What warranty covers the parts and the labor? Get both in writing, and confirm how a light engine is replaced later.
- Who cleans up and patches? Insulation, drywall dust and paint touch-ups should be part of the plan.
For custom residential and commercial installs, Wiedamark LED works with American Starlight Ceilings. Our licensed installation partner has completed over 200 major sports and commercial projects across the US and Canada — NFL, NBA, NHL, MLS, NCAA and NASCAR.
Common star ceiling installation mistakes
- Running out of fiber length: measuring the room instead of the actual route through the attic leaves dark corners.
- A grid layout: evenly spaced stars look like a pattern, not a sky. Real skies cluster and thin out.
- One fiber diameter: without bright anchor stars and many faint ones, the ceiling looks flat.
- Skipping the shuffle: neighboring fibers from the same bundle section twinkle in patches.
- Hiding the light engine: sealing it into a cavity with no airflow or no access makes service hard and can shorten its life.
- Tight bends and crushed bundles: sharp bends and stepped-on bundles lose light. Protect runs in walkable attics.
- Light-colored ceiling: stars look best on a dark finish; a white ceiling with stars reads as dots on paint.
- Ignoring the other lights: recessed lights and fans on full brightness wash out the stars. Put room lighting on dimmers or scenes.
Preparing your room for installation day
- Clear or cover furniture and protect floors.
- Confirm attic access is open, safe and lit, or that the drop-ceiling tiles can be lifted.
- Decide the ceiling color in advance; painting dark before or after the install depends on the method, so agree on the order with your installer.
- Confirm the power location for the light engine is ready.
- Have your layout ideas ready: constellation, Milky Way direction, shooting star paths, sparse areas.
- Plan to be home at the end of the day to see the test in a dark room and learn the controls.
DIY or professional installation?
A DIY fiber optic kit is realistic for a small bedroom or kids' room if you are comfortable in an attic and patient with repetitive work. Professional installation makes sense for home theaters, large or vaulted rooms, finished ceilings without access, constellation mapping and Milky Way bands, and every commercial space. If you are weighing systems first, compare fiber optic star ceilings vs LED projectors and the wider range of LED star ceiling lights.
Whichever route you choose, the components matter as much as the hands installing them. Wiedamark LED supplies starlight ceiling components and kits and fiber optic lighting, backed by 15+ years as an authorized architectural lighting dealer and project coordinator. Every project is quoted to the room: we do not publish one-size price lists because size, method, star count and effects change the answer. Our guide to what drives star ceiling cost explains the factors.

After installation: care and service
- Dust the ceiling now and then with a soft brush or a vacuum on low.
- Keep the light engine's vents clear and the space around it dry.
- If the stars dim, check the light engine first; the fibers have no bulbs.
- Avoid stepping on or crushing fiber bundles during later attic work.
- Adding effects later, such as an extra shooting star path, is easier if the original installer left notes on the layout and engine location.
For the bigger picture on design, components and effects, start with our complete starlight ceiling guide, the star light effects guide and how LED star light ceilings work.
Frequently Asked Questions
How is a star ceiling installed?
How long does a star ceiling installation take?
Can a star ceiling be installed without attic access?
Is it better to install a star ceiling during new construction?
Do I need an electrician to install a star ceiling?
Where should the star ceiling light engine go?
How do I choose a starlight ceiling installer?
Can I install a fiber optic star ceiling myself?
How much does star ceiling installation cost?
Where can I get star ceiling components and installation help?
Get your star ceiling installed right
Tell us the room, the ceiling type and the sky you want. We will recommend the right method and components and follow up with a project-specific quote.
Related
Browse more guides on the Wiedamark LED blog, or see our Luminance design-build program and LED and fiber optic lighting supply.
Our lighting network: starlight ceiling installation, 360° fiber optic lighting, premium pool lighting, WDM Lighting large projects, Dallas commercial LED lighting, Texas LED lighting, Plano LED lighting, LED signage, modular building solutions and Dallas modular structures.